Sunday, April 6, 2014

Grisaille study


This is the grisaille study that we did before starting a grisaille portrait last week. Grisaille refers to a painting done in a monochrome palette that can serve as a base for color application. The purpose was of grisaille study is to understand composition, form-(modeling of each object separately) and value(showing the transitions and shadows in great detail, establishing the darkest darks and lightest lights for the final work) ~ but all this with limited colors. For this one, I've used raw umber and white, a little bit of burnt umber and black. It is unfinished, but it did help me understand the play of contrast and difference of edges(sharp/blurry) to create depth and show objects that are closer/ farther away. 

There are many monochrome painting styles, including grissaile(French) and Verdaccio(Italian). Old masters always did a detailed grisaille study before starting to paint, to be sure of the values and composition. It is a stepping stone towards the finished oil painting. One can add layers of relevant value of hue(glazing) to create a full color believable painting with correct values underneath.

Grisaille is based on neutral and warmish gray tones. And Verdaccio is based on cooler grayish green tones. Some believe that verdaccio method can really enhance skin tones to create high realism because of its greenish underpainting(as green is complementary color for the skin. I read somewhere that when you paint with complementary color for your underpainting, it makes the final work more believable.)
Another method that we used here at school is by underpainting in the same colors that we plan to use in the final painting. (It is like creating campitura with different colors) And thus, the first layers of paint laid down serves as a basis for applying the subsequent layers to achieve likeness.

Here is the portrait in Grisaille I am working on; using  raw umber, and a tiny bit of burnt sienna and white. 4 more days to work on this one. 

I was reading about correcting and tone neutralizing for creating believable skin tones in painting, when I read about its use by makeup artists. It is really interesting to know how the same principles were used in the make up industry during the switch from black and white to color films. The makeup artists had to study all the principles of color and its behavior in different light(warm light/cool light) to do the color corrections while applying makeup. Back then, there was no technology to aid the artist. Only color theories to experiment with. So it was like applying right quantity of green shade(complementary of red), purple shade(complementary of yellow) so that it neutralizes the effect of red-yellow skin blemishes when captured by camera, with a certain light(warm/cool). Even the actors had to undergo several tests to make sure that the shades of green/purple looked correct for their skin color. That's the reason, they say makeup is an art-form, and it's interesting to know its history as to how it has evolved, even when there are so many options (concealers!) to aid makeup artists now.

Tuesday, April 1, 2014

Ritratto a Firenze!

I had taken these pictures in February near the entrance of our building. Really liked how the sunlight made everything look so dramatic. Color of the reflected light looks lovely in the pink one. It was a beautiful day. I had thought of taking portrait commissions while I am here in Florence. So I had to have a nice poster. And I wanted to have handmade type. So used paper quilling to create these typography, Ritratto for Italian, and other in Inglese! 
I'll edit them in photoshop and use them in the posters. Also working on a series of portraits, hope to complete them soon!

Portraits


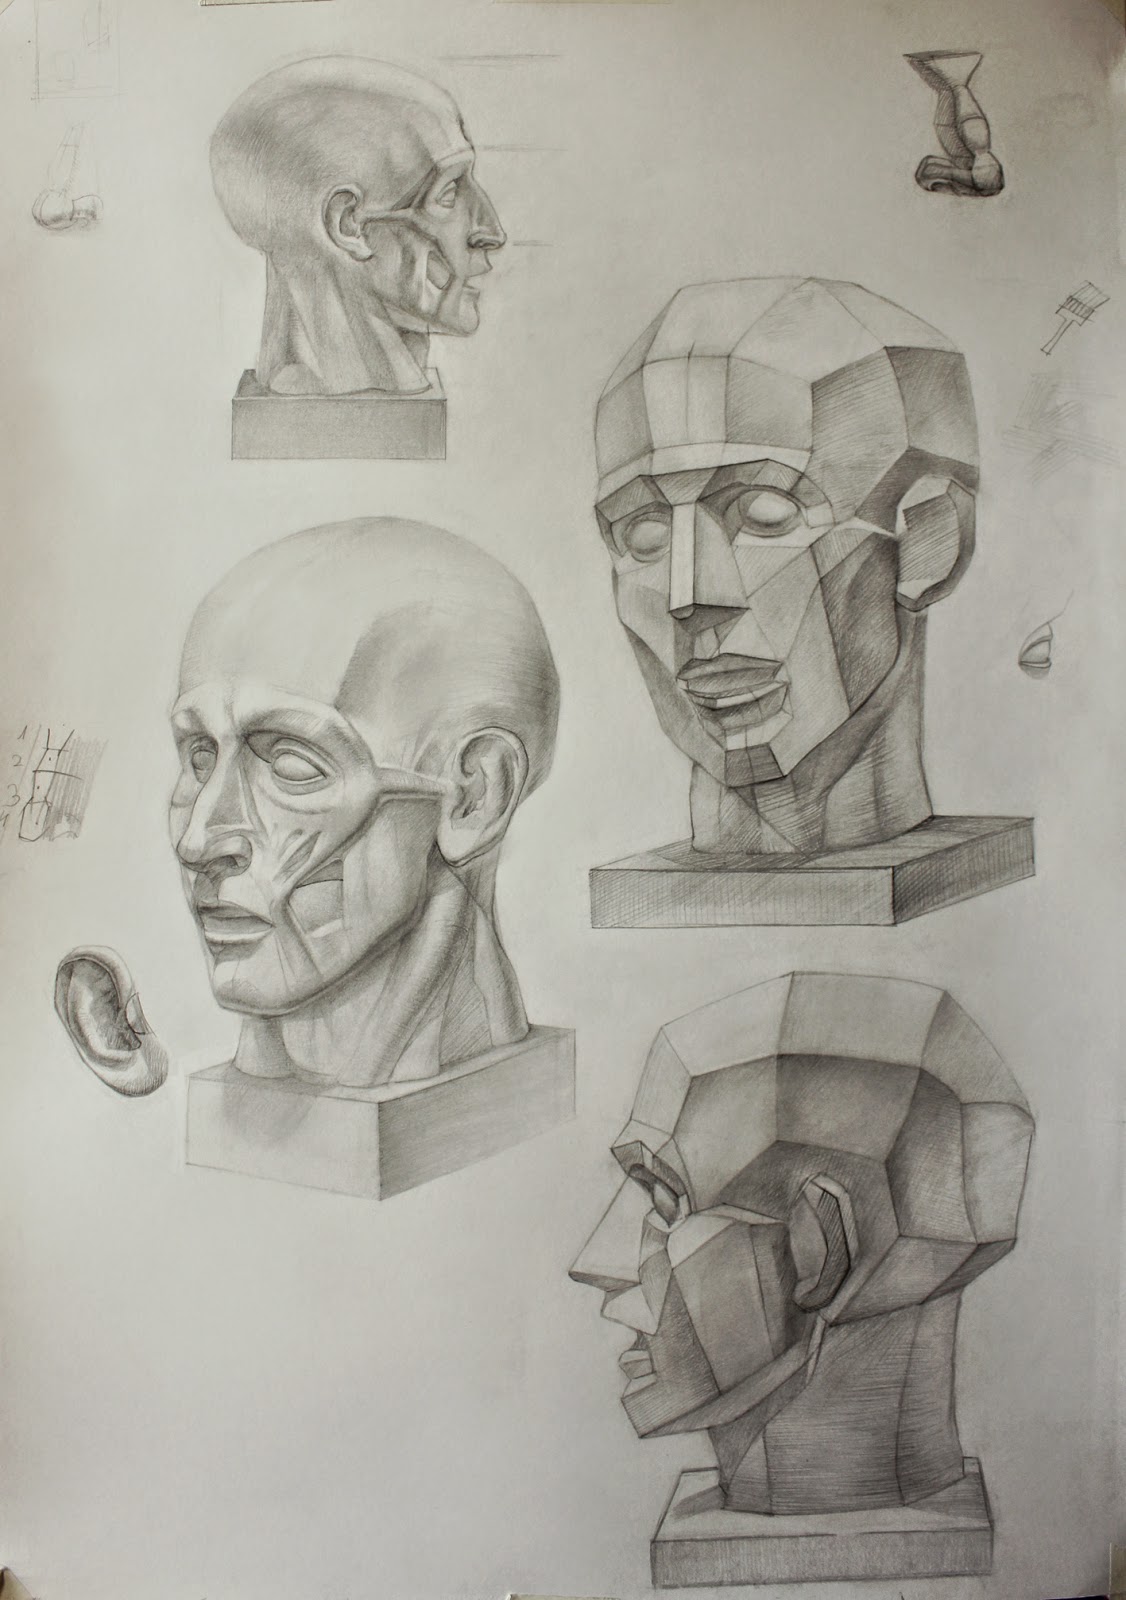
Cast head:

Studying the planes and the muscles of the face:

Sunday, March 23, 2014

Color studies

 First color study, still life:( 10 days, roughly 2.5~3 hours a day)
 Pictures are taken from my phone camera, will try and take better pictures with dslr soon!

Second still life- this one is going to be a grisaille study. We began it last week, one more week on this one. 

The weather is getting so much better here now, I plan to go outdoors for plein-air sketching and painting soon :)

Leonardo da Vinci

I have been watching some BBC documentaries these days and doing a bit of reading on the history of art movements. So for all my art-loving friends, here is something to watch:
Leonardo Da Vinci - The Man Who Wanted to Know Everything Part 1 

When I came here, I knew very little about the artists and the art history. I was only interested in knowing the techniques to draw and paint. And I am happy that this attitude has changed now. I am fascinated by the stories of old masters and have realized that knowing the history does reflect in the art one creates, even now when the tools and resources have changed. Our anatomy instructor said Leonardo was the greatest artist of all times. And I used to wonder why is it that he has very few paintings then? The documentary answers it all. He did play many other roles including that of an architect, mechanical engineer, inventor, poet, sculptor, and anatomical artist, scientist, studying the physics, geology, hydrodynamics, pyrotechnics, optics, name it and he has touched upon the subject in fifteenth century. I think it is very inspiring to know about his discoveries out of curiosity and free thinking, despite the limitations of his time.

He was the first one to show presence of 'air' with his Monalisa painting. He realized the atmosphere, air particles change the way we 'see' things that are at distance. And it is important to show atmospheric presence if one has to create the illusion that the person belongs in that environment and unites with the picture and is not just a cutout shape. Here in the class we do the same thing, push the area closer to the background to make it recede, by lowering the contrast, to create the depth and a sense of atmosphere. "Always Trust Leonardo" we are told. Also, before Monalisa, all the portraits were done in the profile view and were static. With this painting, he tried to capture the middle of the movement, disturbing the staticity. It was then followed by all the artists of his time and later. Even the photographers now do the same for portraits, disturb the staticity, reproducing one of his discoveries.
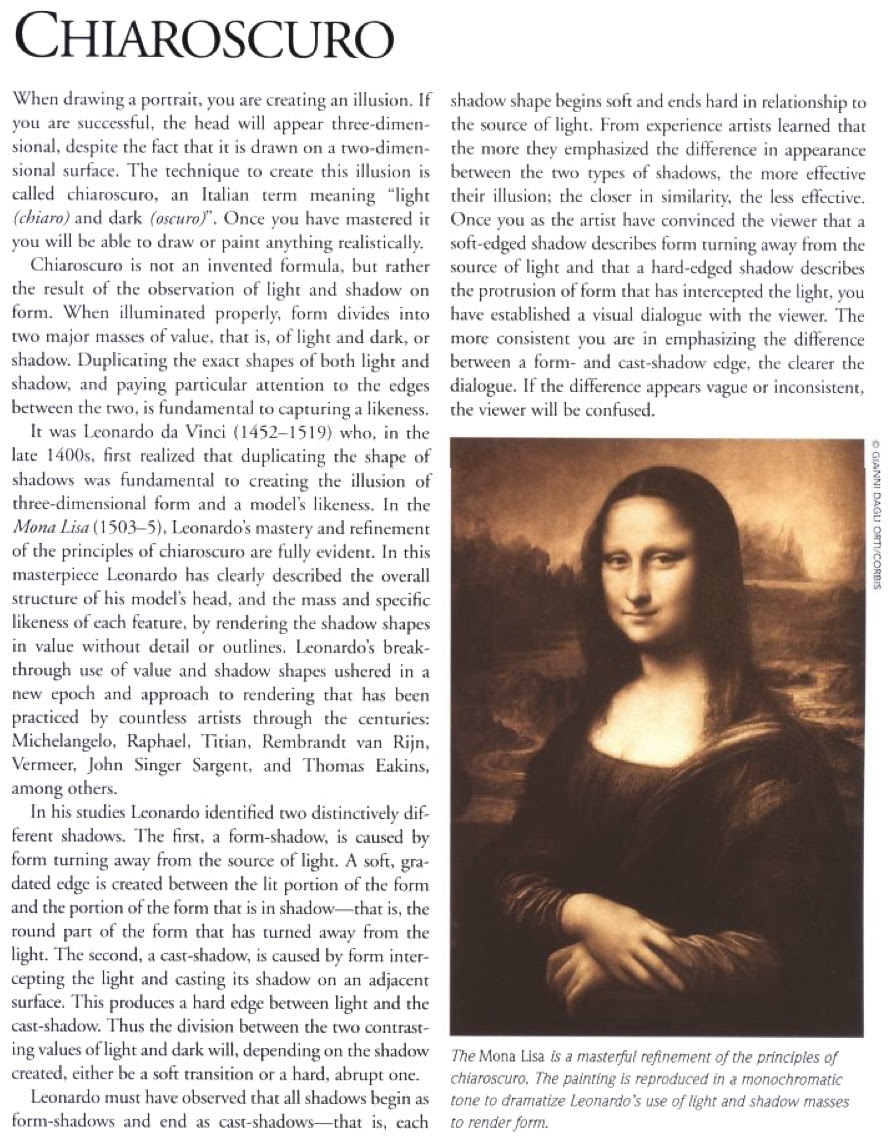
Here is a page on 'chiaro scuro' method for creating illusion of three dimensionality, from 'The Artist's Complete Guide to Drawing the Head'~ by William Maughan.
(screenshot from amazon)

There are many more documentaries if you like to watch(Below are some of the youtube links):
Rembrandt
Gustav Klimt
The Divine Michelangelo  | Michelangelo - Private life of a Masterpiece
Raphael
Vermeer - Private life of a Masterpiece | Girl With A Pearl Earring (trailer)
The Great Artists Post Impressionism
Vincent Van Gogh: The Power of Art
Breughel - Private life of a Christmas Masterpiece
Édouard Manet - Private life of a Masterpiece 
Caravaggio
Bernini
Degas

Saturday, February 1, 2014

Academic studies

So my semester with Russian academy of art in Florence has began and our anatomy module has started with head anatomy and scheme.

 My class:

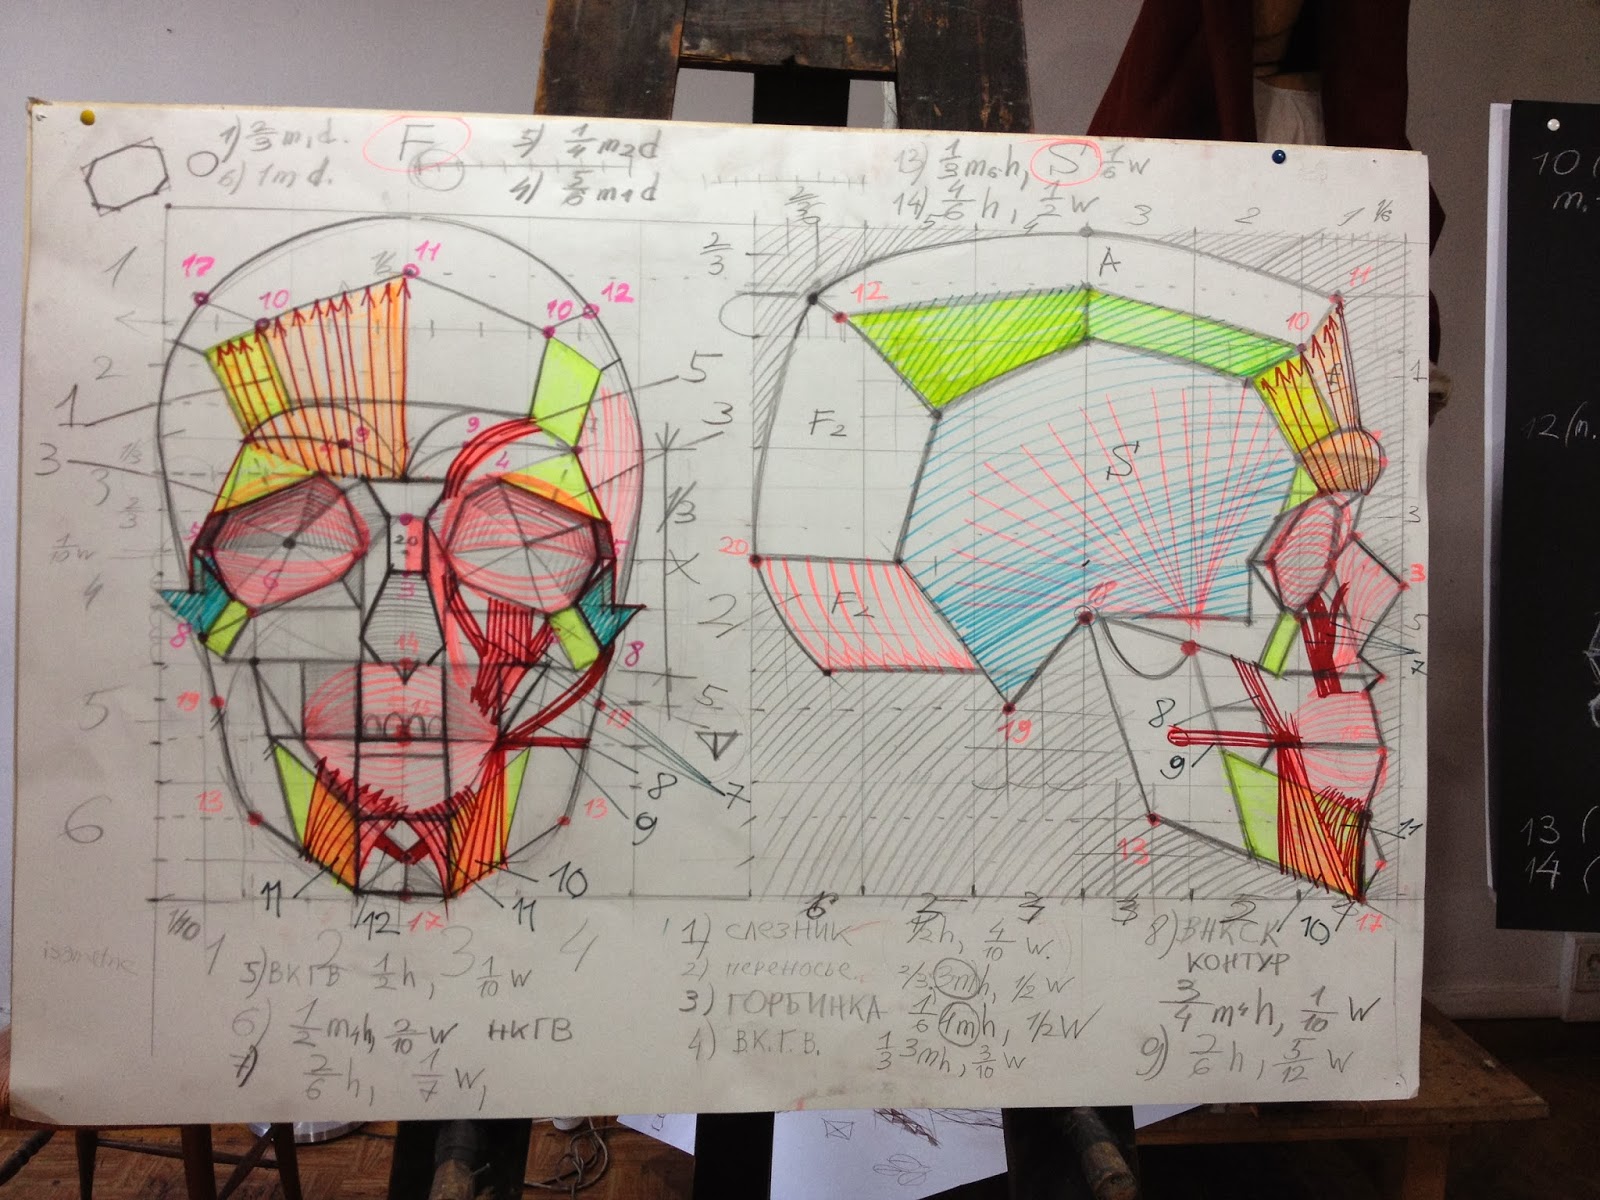
Skull schematic:


Some of my unfinished attempts in understanding the structure of skull. It is really interesting to draw things when you know the scheme!

After studying the skull, next is studying the planes and muscles of the face. Here is one unfinished drawing I did last week(the one with facial muscles):

The approach here is to draw everything in a constructive way. Like you imagine the forms by breaking them down into simplest forms and start by drawing everything as if it's all transparent. Then gradually make it complex, by adding the details that are on the surface. So go from simple to complex and then again simplify. Shape, volume, and structure(how it is constructed)- three things to focus on. Everytime you draw something, think about the weight, which gives the volume, shape.


I have started with this portrait of Claudio, Ashish's housemate. It's interesting how one can apply the scheme to what we see and draw it in a constructive way. It's like you are drawing this portrait, but actually you are trying to find the points that you studied in the scheme. 

Now when I see the face, I can  imagine the structure beneath the skin(little bit), which is good. I know which points are the amplitude points on the face, and which ones are indents, which ones to highlight and all that.. It's fun, and I hope to capture the likeness in this portrait while applying all the rules that I learnt.

Also, I had taken a five days workshop in December to study hands, knee and feet. Its difficult to draw them without having the understanding of the underlying structure. So we studied the schematics and also tried to paint hands from life(unfinished).


Caribbean island


Last week I finished working on this illustration for a magazine house.
The article was about cultural influences of european countries on Caribbean islands.
English influence in Jamaica,
The French influence in St. Lucia,
The Spanish influence on Puerto Rico.
I had to make paper models of fishes with flag colors of European countries.
 

Close-up:

Process images:
Here is the link to some old paper model works.