Saturday, February 1, 2014

Academic studies

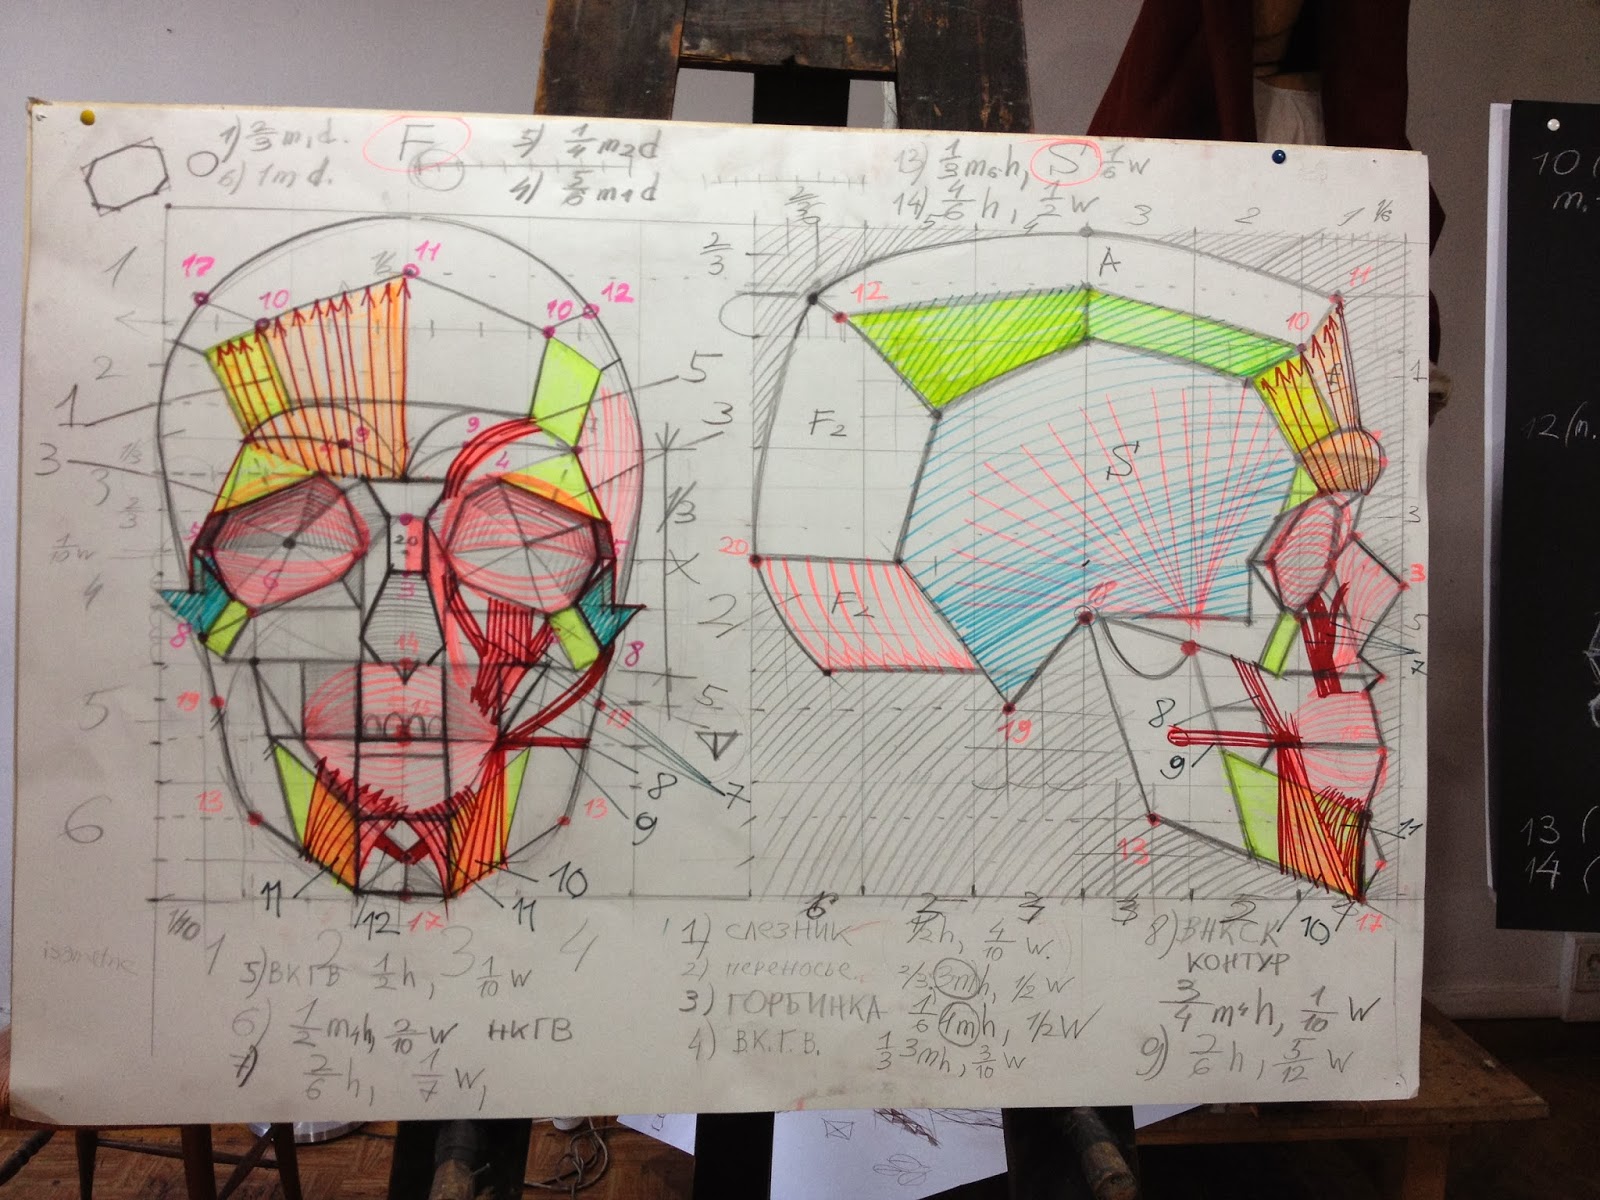
So my semester with Russian academy of art in Florence has began and our anatomy module has started with head anatomy and scheme.

 My class:

Skull schematic:


Some of my unfinished attempts in understanding the structure of skull. It is really interesting to draw things when you know the scheme!

After studying the skull, next is studying the planes and muscles of the face. Here is one unfinished drawing I did last week(the one with facial muscles):

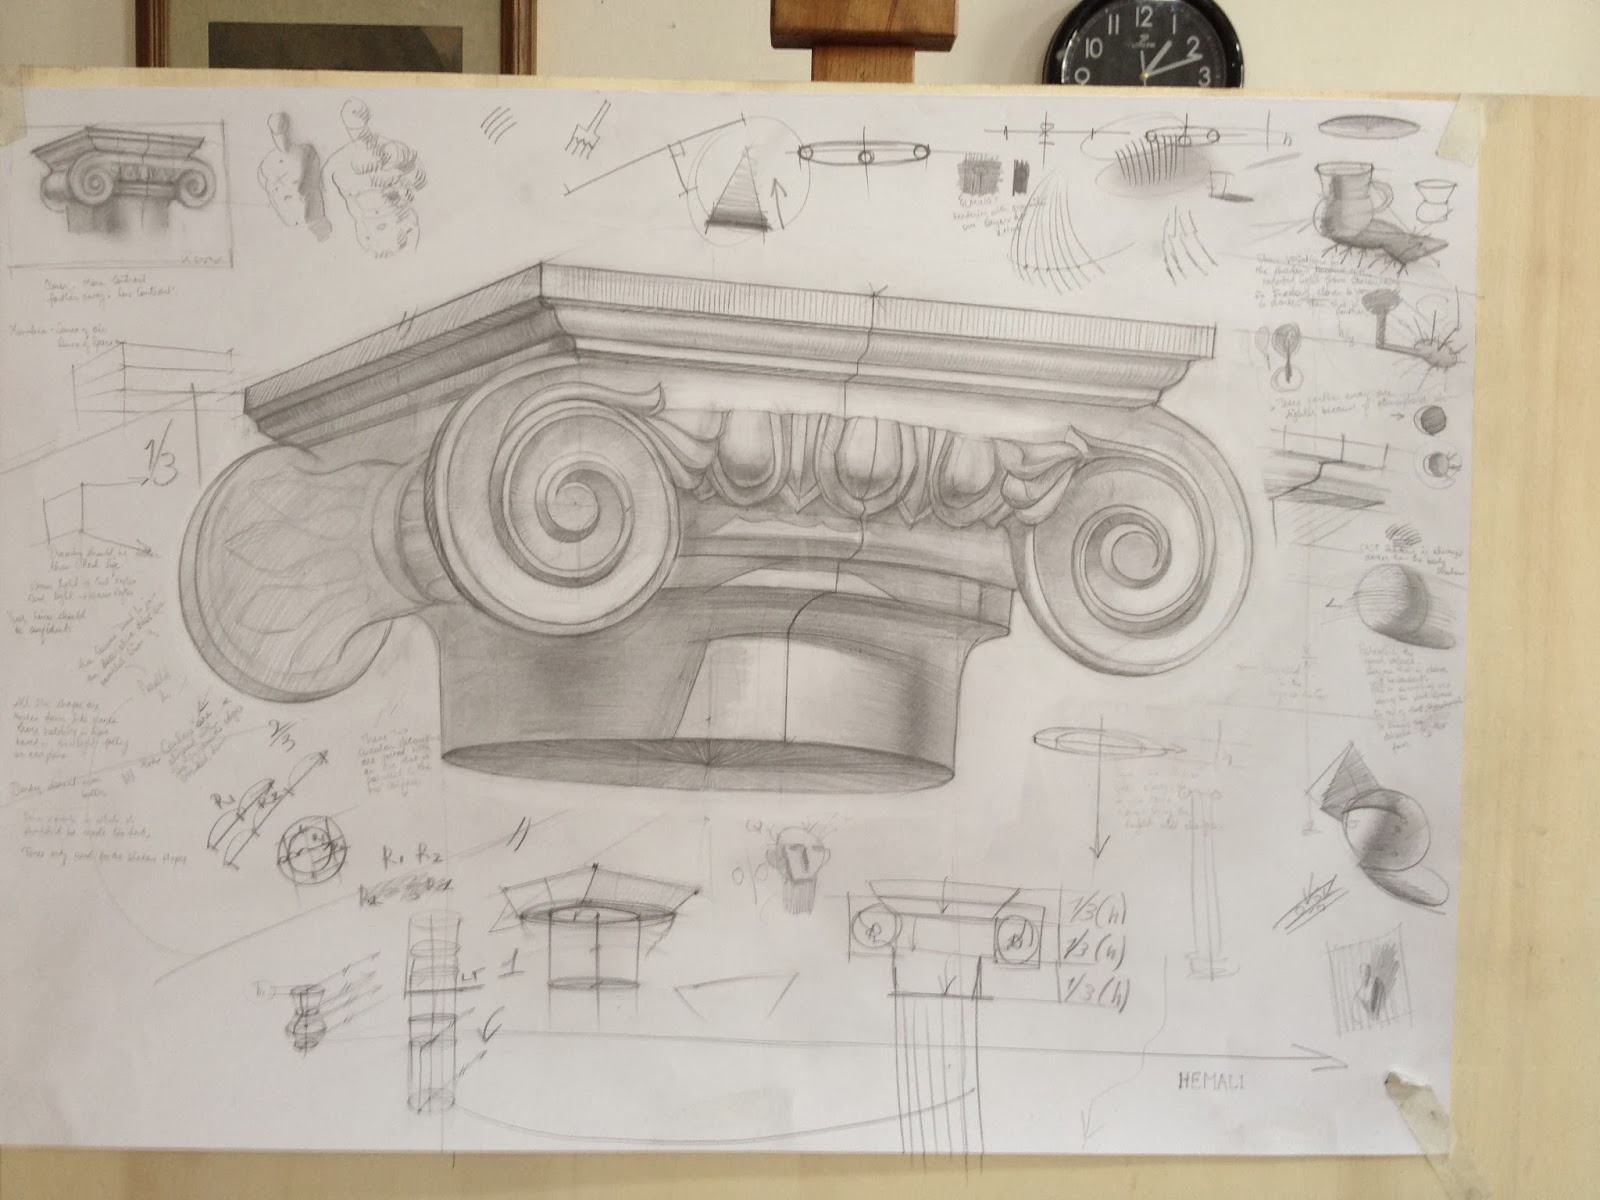
The approach here is to draw everything in a constructive way. Like you imagine the forms by breaking them down into simplest forms and start by drawing everything as if it's all transparent. Then gradually make it complex, by adding the details that are on the surface. So go from simple to complex and then again simplify. Shape, volume, and structure(how it is constructed)- three things to focus on. Everytime you draw something, think about the weight, which gives the volume, shape.


I have started with this portrait of Claudio, Ashish's housemate. It's interesting how one can apply the scheme to what we see and draw it in a constructive way. It's like you are drawing this portrait, but actually you are trying to find the points that you studied in the scheme. 

Now when I see the face, I can  imagine the structure beneath the skin(little bit), which is good. I know which points are the amplitude points on the face, and which ones are indents, which ones to highlight and all that.. It's fun, and I hope to capture the likeness in this portrait while applying all the rules that I learnt.

Also, I had taken a five days workshop in December to study hands, knee and feet. Its difficult to draw them without having the understanding of the underlying structure. So we studied the schematics and also tried to paint hands from life(unfinished).


Caribbean island


Last week I finished working on this illustration for a magazine house.
The article was about cultural influences of european countries on Caribbean islands.
English influence in Jamaica,
The French influence in St. Lucia,
The Spanish influence on Puerto Rico.
I had to make paper models of fishes with flag colors of European countries.
 

Close-up:

Process images:
Here is the link to some old paper model works.

Friday, January 31, 2014

Paris visit

It's been long since I last updated the blog.. Too many things to share. I went to Paris over christmas last month and it was definitely one of the most memorable trips ever. It was a last minute thing, I booked the tickets at night and flew in the noon. Being my first flight experience alone (Florence- Pisa- Paris), I was really excited and nervous the day I left!
Pisa to Paris
And then I reached this magical city of love and lights! As it was christmas time, everything looked very beautiful as the decorative lights were up in and around the city, creating this lovely holiday-ish mood. And Paris does look very beautiful when it rains :)
Day 1 in Paris

On our way to musee jacque andre 

Sacre Coeur(Very beautiful!)
And the most enriching experience had been visiting the art galleries and museums. We went to Louvre, Orsay, Jacque Andre museum and Petit palais.. and I had had such a great time just seeing the works of old masters. I never really studied art before, and many of the artists whose name I had only heard or read in the books, I saw their works and was totally mesmerized by the beauty and the grandeur of the paintings. Orsay has the most extensive collection of impressionist paintings and it was something so wonderful to have had this experience to see them so close and appreciate the colors and the strokes and the details..

Here are some shaky pictures taken from my phone camera:
Alma Tadema:
The Roses of Heliogabalus(1888)


Portrait of Watelet by Jean Greuze(1763-65):


 Details of drapery:


Details of the hand:


Isn't it beautiful!!! This one was in Louvre. And it was just one of the thousands of paintings I saw. There were such amazing paintings and drawings and sculptures.. Too many to see in one day. I started noting down the names of artists I liked. Filled one page quickly, then another, and another and another and on and on... Then I stopped.

It was overwhelming. I don't want to be overly emotional but sometimes when you see so many amazing works, it is inspiring yet daunting at the same time. Makes me want to do it all and learn it all as quickly as possible.. They say it takes years of hardwork and patience. The training of an artist begins at the age of 8, when they give him a bone and ask to study it. By study, they say, he has to thoroughly understand bone's structure in all the angles, perspectives, so if he has to draw it from the memory, he should be able to draw it. He needs to study all the bones, muscles to understand how the figure is constructed, what is underneath the layer of skin. Then comes the drapery, by understanding the structure and construction of cloth and all that. Then there is composition to study, and the colors, their behaviour with each other, values and whatnot. So basically it all takes years of practice and dedication to be able to draw, paint well.. They say it is important not to get discouraged with the struggle during the initial stages of drawing, construction... So that is one thing to remind myself everyday when I lose patience. 

I will be updating the post soon with watercolors of the places I visited.

Monday, December 16, 2013

Figure drawing II


This one is from the life drawing class.  Graphite on Canson paper. Ten days pose.


This one really helped me understand the values, and how they can create the illusion of forms on a paper. 

Figure Drawing


Study from figure drawing class:
Five days pose:

Ten days pose, graphite on Canson paper:


Bargue II

My second Bargue drawing:

Steps:
1) Outer construct(Plotting the points for the outline):
Whenever there is a change in direction, plot that point. Join the plotted points with straight ghosty lines in order to understand the structure of the form. To check the correctness of your bargue in between, just measure the distance between farthest two points. Check multiple points to make sure that points are not off.

2) Construct of the shadow shape (Plotting the points of shadow(black) shape)


3) Articulation of the construct.
4) Articulation of the shadow shape(make sure that you are articulating the shadow shape and not the half tone. Also, must always use straight lines for this)


5) Fill in the shadow shape construct with value 2 or 3. When you put in this value 2 or 3 in your shadow shapes, you can see the shapes more clearly. Correct/articulate if required.

Check the shapes and make adjustments, refine it, fix it. 

6)Fill it with value 7. This value of my darkest shadow shape DECIDES the value of the half tones. If shadow shape is lighter then half tones will be even lighter. And so it will be difficult to make the form turn. So spend time in getting the shadow shape value right. 
Understanding the values is very important. They say painting is nothing but mastering the values and colors. Colors are second thing. Your values must be correct. So you take any colored painting by old masters and then make it black and white, it still has that three dimensional form. Big form modeling is extremely important when you need to show an object turn. Body is nothing but the masses and shapes. You need to make these shapes turn in order to create illusion of three dimension.  The dark layer has to be as even as possible without any dots.

7) Big Form Modeling:
At this stage, we need to work on the lights. 
Remember that you are just concentrating on making the form turn at this stage. So forget that it is a head or a face or eyes. Just think of it as simple geometric shape like cylinder or sphere. In my case, it is an egg. I have to make it look like an egg. Dark values are already in place and I should apply lighter values to turn this form. Go from dark to light. Turning should happen both ways: First left to right(horizontal modeling) and then top to bottom(vertical modeling). ONLY work on the lights. Do not touch the shadow shapes at this stage. You have to create an illusion of 3D form. With the 2B graphite dust, start shading from dark shape to the light, using a flat brush.


8) Variations of the darks (value 7,8,9) :
At this stage, work on the shadow shapes. Identify the subtle variations in the darker values of the shadow shape, and articulate it at this stage.
Identify the Bed bug line - It is the dark line that turns dark just before the shadow shape ends.  Redo it. Smudge - make it dark. It is part of the shadow shape.
Wherever there is a turning of form, make it darker.

15) Variation of the lights.(0,1,2,3,4,5,6)
Big form modeling establishes the darkest tone which helps in establishing the half tones(based on the darkest values of big forms)
After that medium form modeling starts(like nose, forehead) after this, small form modeling(like hair, beard) smaller details are modeled for three dimensionality on top of the big form that looks like an egg or cylinder. Value of the small forms and medium forms (which are on top of the big form) should be adjusted to that of the big form. For example, on the beard, from right to left, it should gradually fade out. Center area of the beard can not be dark. Keep everything in context of big form.(such that the darkest values that you put in at this stage should not break the big form which is already modeled)
When you come across halftones, make sure that you don't make it too dark. It should be a part of big form and not break the big form into two medium or small forms. Hence the value is important to give an illusion of smaller changes in direction of planes of that big form. Never break it by putting in wrong values.

16) Rendering: Choose a section and bring it to finish.
Start with the area that needs most attention.

And that's it!

Thursday, November 21, 2013

Illustration

Medium: Paper cutouts, watercolors, photoshop

Making images: